NOTE : Due to Indian Govt restrictions Paypal payments are not accepted. Sorry for the inconvenience

procedural vehicle modeling 1&2
total duration - 3 hrs 51 mins
The video training includes the hip files
Training level - beginner
individual parts

taxes as applicable
credit card and paypal
combined
10% off

description
This training demonstrates how to use Houdini to create a parametric vehicle. Over the course of this training we will see how to use Houdini's basic polygon modeling techniques to create a fully controllable and procedural Vehicle model and also set up all the various parameters required to control and animate the vehicle.
The training will also explain how to add secondary jiggle motion to the vehicle animation using CHOPs.
Towards the end of the training we shall go through the animation, materials, lighting and rendering of the "Silence of the Vans" animation in which I had used the Procedural Vehicle.
part 1 - modeling the front, rear and middle
Content Details - 12 Video Chapters (with Audio)
Duration - 104 mins
price - $20
lesson plan
Bus Front Details - Setting up the basic bus shape
Bus Details - Using Cookie SOP to add cuts for window, door and tires
Front Door- Modeling the front door from the shape extracted from the Cookie SOO
Windscreen and Grill- Adding windscreen and grill to the front of the bus
Headlights - Modeling the headlights and attaching them to the bus using a Ray SOP
Bumper - Modelling the front bumper and number plate using points extracted the front of the bus
Rear Basics - Building up the rear of the vehicle
Rear Door - Adding doors to the rear body when the bus is switched to a van. Also setting up the transforms to animate the doors opening and closing
Rear Details - Modeling tail lights and number plate for the back
Midsection Basics - Setting up the middle using a central line which will define the entire length of the vehicle.
Midsection Details - Adding windows to the middle using a For Each SOP

Part 2 - Additional modeling, animation and scene setup with materials and lights
Content Details - 11 Video Chapters (with Audio)
Duration - 127 mins
price - $20
Lesson Plan
Tires - Modelling the tires for the vehicle
Additional Doors - Building additional doors in the middle of the bus
Additional Doors combine - Adding the doors into the main body
Carriage - Modelling the carriage on top of the vehicle
Controls - Adding some flower like structures on the hills
Lights and Materials - Building groups for material assignment. Applying materials and setting up a basic HDRI
Animation and Jiggle - Animating the Vehicle and adding secondary motion using Jiggle CHOP
Bus transformation Animation - Using the controls we had setup to transform the vehicle from a bus to a van.
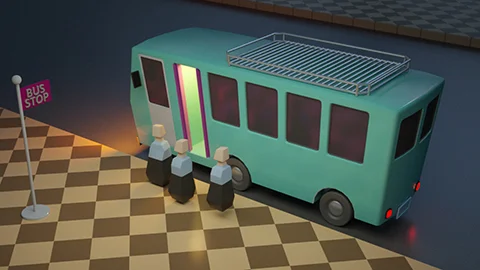
Scene setup and Animation - Looking at the "Silence of the Vans" scene. Going through the scene models and how the small human characters were animated
Scene lights and materials - Looking at the "Silence of the Vans" scene. Going through the scene lighting and materials, especially the pavement material.
Render and Composite - Looking at the "Silence of the Vans" scene. The final render setting and the composting the scene in After Effects.
REQUIREMENTS - It would be preferable to use Houdini 14 Indie version. The Houdini files are in the Houdini Indie format. However the training can even be completed in the Houdini Apprentice version without any problems.