NOTE : Due to Indian Govt restrictions Paypal payments are not accepted. Sorry for the inconvenience
floating islands of houdini- 3 parts
total duration - 7 hrs 50 mins
The video training includes the hip files
Training Level - Intermediate
REQUIREMENTS - Houdini 13. We will be using packed primitives a lot, which are only available in Houdini 13 and above
individual parts

taxes as applicable
credit card or paypal
combined

Description
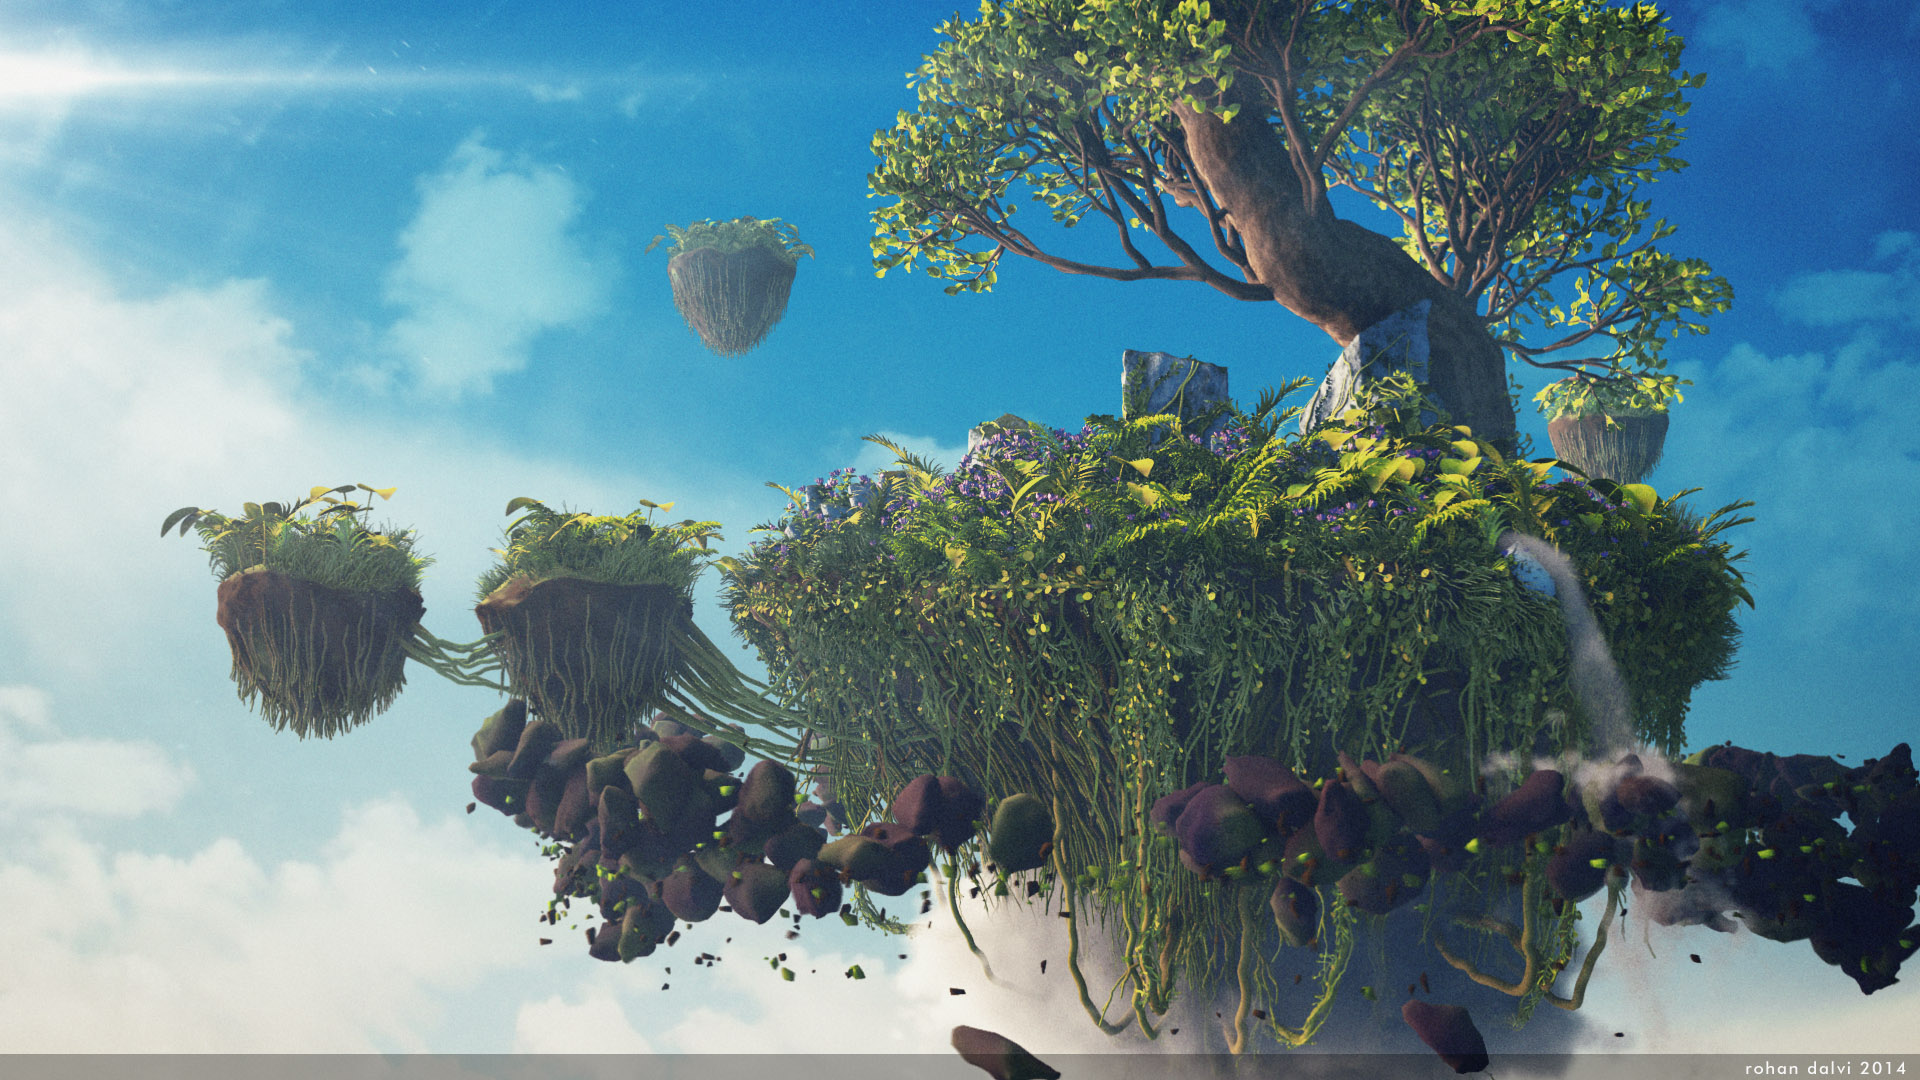
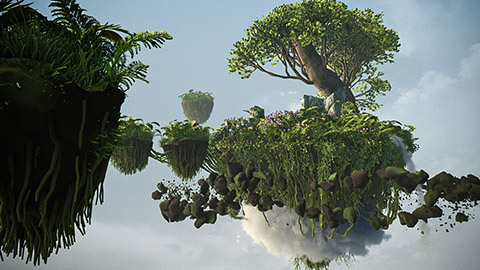
The aim of this commercial training is to take you through the process of creating the "Floating Islands" image, all the way from modeling to render
The training covers various aspects including terrain modeling and sculpting, generating large quantities of plants and vegetation in Houdini. The plants and trees will be developed using L-Systems. The training will also cover Rigid Body Dynamics, Particles and Fluids to create certain elements of the image.
The training is split into 3 parts, each part is available separately.
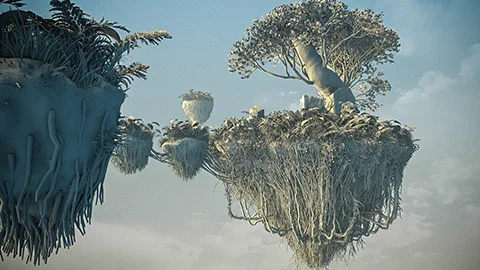
Part 1 will cover terrain modeling, modeling using the VDB tool set. It will also deal with creating grass using the fur procedural and a variety of creepers and vines on the island and the druid circle.
Part 2 will cover the basics of L-systems and will use that knowledge further to create plants, ferns and trees.
Part 3 will cover the dynamics tool set such as RBD, creating custom forces to create the debris field, Fluids, particles and clouds. This part will also cover the final material, lighting and compositing of the image. Given below are the details regarding all the 3 parts.
part 1 - Island and grass

Content Details - 11 Video Chapters (with Audio)
Duration - 3 hrs 2 mins
$30
Lesson Plan
Introduction
The main Island - modeling the main island using a displacement, sculpting and noise maps
The Druid Circle - modeling the stone circle using VDB tools
Druid Circle wall - building the wall around the druid circle
Curve Primitive - understanding how the various attributes required to render curves
Fur Procedural - Understanding the basics of Fur procedural shop
Island Grass - Using techniques learnt in the previous 2 chapters to create grass for the island
Hanging vines - creating vines for the islands
Vine Leaves - adding leaves to the vines
Creepers - adding additional creepers and ivy on the island and the druid circle
Island base details - adding roots and stuff to the base of the island
part 2 - L-systems, plants and trees
Content Details - 10 Video Chapters (with Audio)
Duration - 2 hrs 30 mins
$30
Lesson Plan
Cloverfield - modeling a three leaf clover and creating a field of it
Design correction - Just correcting the design of the main island
L-systems Basics - Learning the basics of L-systems.
Flowers - Modeling a flower and using L-systems to model the plant.
Leaf - Using L-system to model a custom leaf
Fern A - Making a complex fern using L-systems and creating multiple variations to scatter on the island
Fern B - Creating a second variety of Fern
Tree - Modeling a complex tree using L-Systems
Island Color - Building the island color using slope and noise maps
Island Moss - Adding moss at ground level and basing it on the slope map
part 3 - Debris Field, clouds, waterfall and final render
Content Details - 7 Video Chapters (with Audio)
Duration - 2 hrs 19 mins
$30
Lesson Plan
Smaller Islands - complete procedural modeling of the smaller islands and adding vegetation on them
Clouds - Modeling and lighting the cloud at the base
Debris Field - modeling a fully animated debris field around the island using RBD and custom VOP forces
Debris particles - adding additional details to the debris field using particles
Waterfall - Creating a waterfall using the Houdini fluid systems
Materials light and render - adding simple materials, building the lighting and setting up takes for the final render
Final Look - Building the final look of the image in After Effects
REQUIREMENTS - Houdini 13. We will be using packed primitives a lot, which are only available in Houdini 13